LifeWatch Belgium e-Lab: User Guide
Section outline
-
LifeWatch ERIC builds and operates open e-science infrastructure that can support biodiversity and ecosystem research. The developed e-services facilitate open data exchange, visualization and analysis and are provided to the user through dedicated Virtual Laboratories and applications.
The Belgian LifeWatch E-lab, developed by LifeWatch Belgium, is one of these virtual laboratories.
This online application allows users to standardize, analyze and visualize their data, making use of web services built on top of internal and external reference databases. A user can select several data services (taxonomic, geographic, thematic, etc.) and run them successively through a straightforward user interface. The LifeWatch.be web services can be used in a concatenated way, where the output of one web service is the input for the next web service. Establishing such workflows helps solving (complicated) biological questions.
This user guide explains the use of the LifeWatch web services.
-
The E-Lab is an interactive section of the LifeWatch.be where portal users can upload their own data using a standard data format, and choose from several web services, models and applications to process the data.
To successfully process your data you must follow these 5 steps:
1. Upload your file
2. Select web services
3. Verify order, Change order (if necessary), and Run
4. Preview Screen
5. Getting the Results
To upload your own data files to the e-Lab, you will require a log-in and password. You can obtain these freely by registering here.
[Note: without log-in and password you can use a marine or terrestrial demo file to discover the functionalities of the e-Lab.]Check out the instructions for each single step in the next blocks.
-
Prepare your data file for upload. Allowed file types: Plain text [TXT], Plain text [CSV], Excel [XLS] and Excel [XLSX].
[Note: All web services (except one) require the uploaded data to be in the standard LifeWatch data format, based on and compatible with the OBIS Schema and Darwin Core. The only exception is the "Check OBIS file" web service, which requires the uploaded data to be in the OBIS Schema format, instead of the LifeWatch data format. In the dedicated section of this user guide you can find a description of the LifeWatch data format, some examples, and an overview of the required fields for every web service. ]
Click on "Browse" or "Choose file" (depending on your browser) to upload your file. This will open the file explorer on your PC. Select your file.
Heading: use the flag box to indicate whether your first row contains the column names or not.
Column delimiter: select the relevant column delimiter: Tab, Semicolon (;), Comma (,) or Vertical bar (|)
Decimal symbol: select the relevant decimal symbol: Comma (,) or Point (.)
Data format: select "lifewatch" for all web services (except for "Check OBIS file"); only select "obis" for the "Check OBIS file" web service.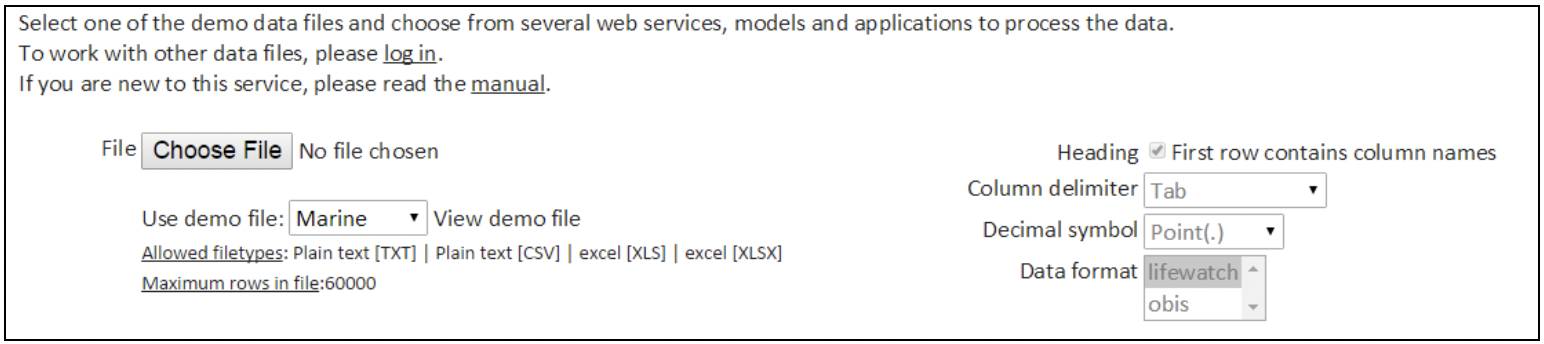
-
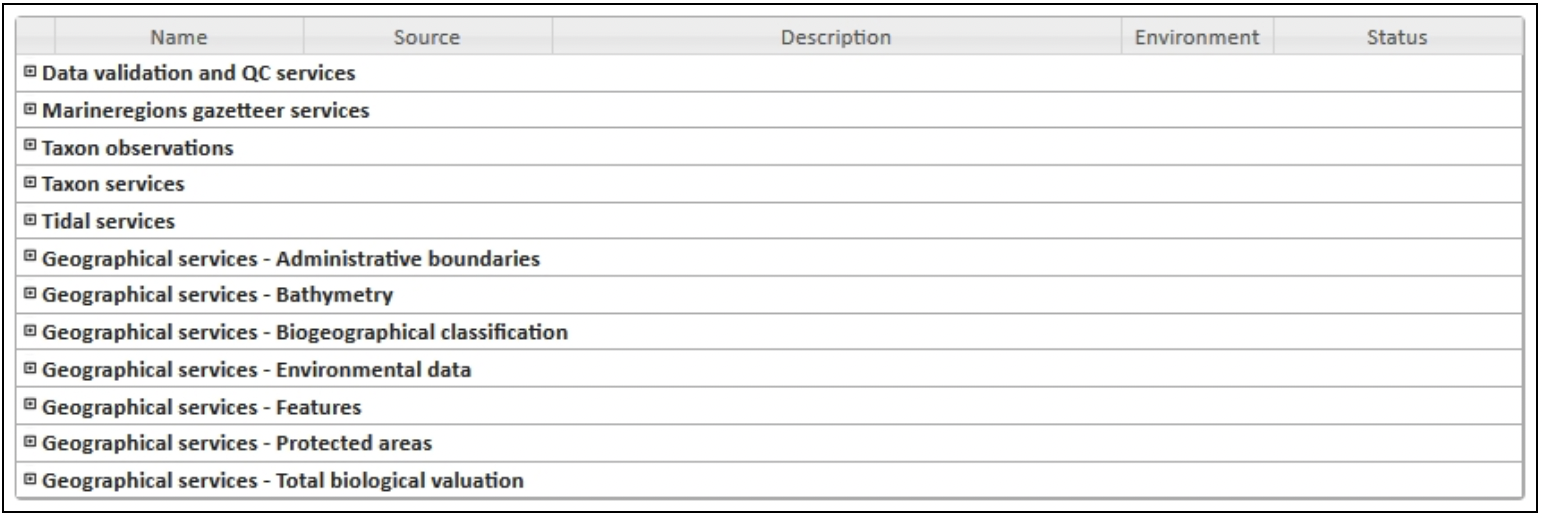
Choose the desired web services. Clicking on the "+" next to each category will list the individual web services. In this overview every web service is provided with a short description, source, whether the service is applicable to marine or terrestrial data, and its status.
[Note: A more extensive description of the single web services can be found below in the dedicated section of this user guide.]
-
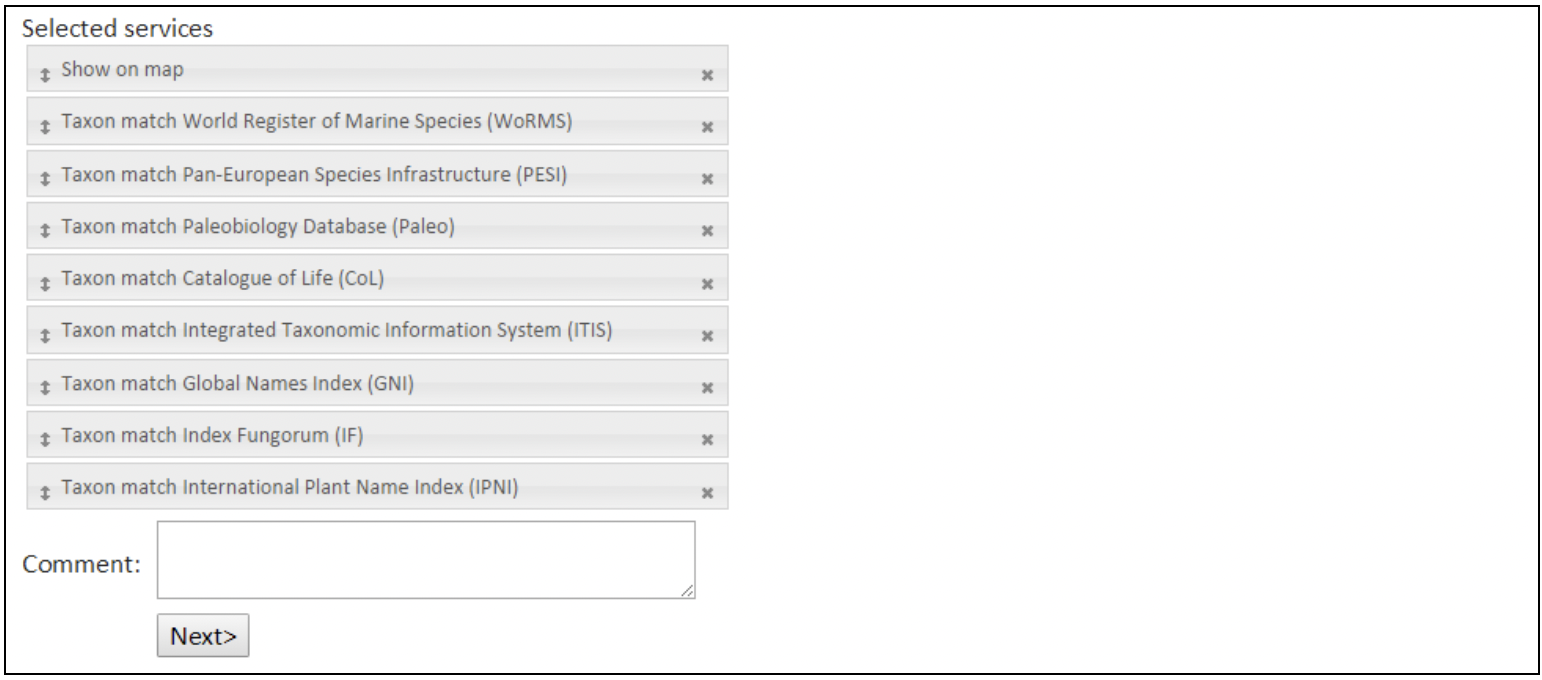
The selected web services are shown in the lower part of the screen. In case of multiple web services selected, the order can be changed by dragging the grey bars with the arrows on the left.
-
When clicking on "Next", you are redirected to the preview screen. Select the column names from the data format term that correspond to your columns. In the example below a list with coordinates (data file = 2 columns containing latitude and longitude) was uploaded and the requested data service was "Bathymetry Southern Bight of the North Sea". The options "Latitude" and "Longitude" were selected from the data format term.
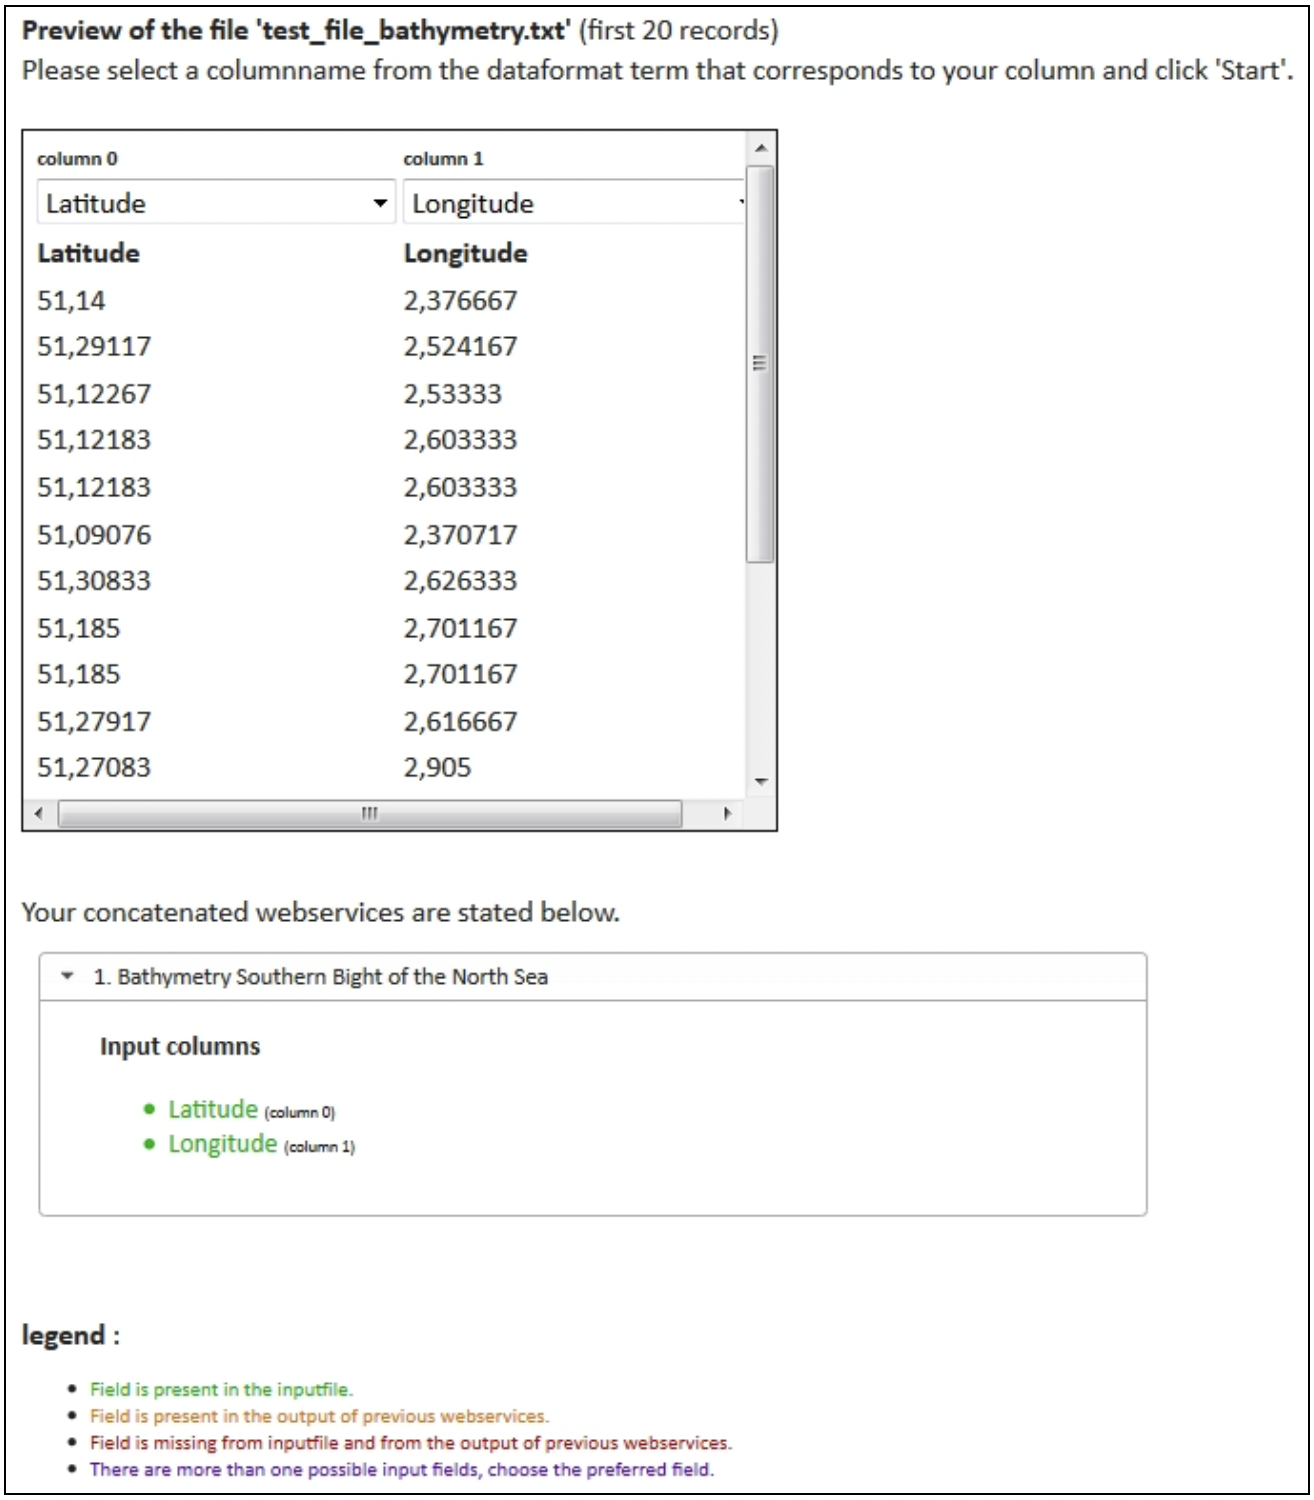
In the lower section of the preview screen, you can find information about duplicate or missing fields per requested web service.
Duplicate fields can occur in case of concatenated web services: the field is present in the original uploaded data file (the input file), and the field is also generated by a previous web service. Choose the correct field.
-
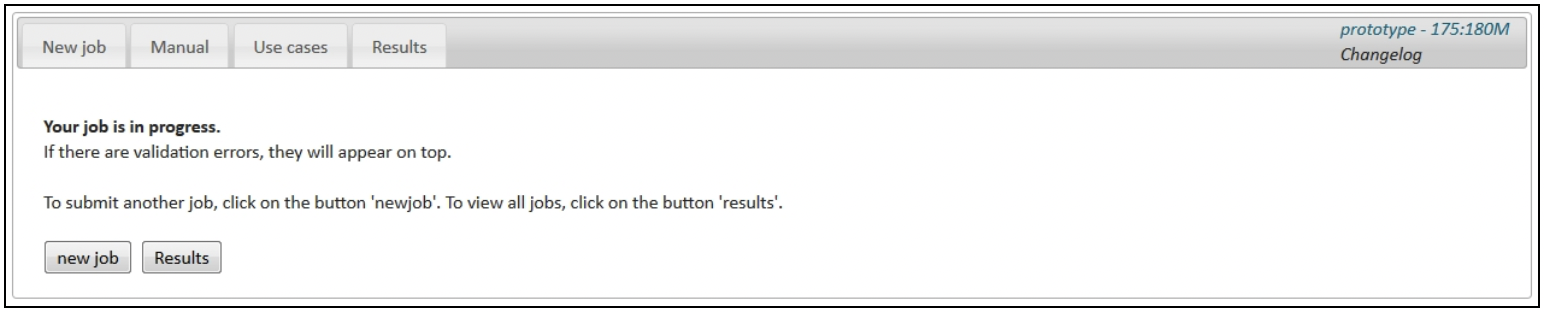
Click "Start". The following message appears:
Your results will appear at the top of the results table. The "filename" is the original data file you uploaded. Within the "resultfile" additional columns have been added to the original file, containing information derived from the requested data services. The "resultreport" gives an overview of the requested web services and any errors that might have occurred during the process. These files are linked to your account and can be downloaded for further analysis at any time.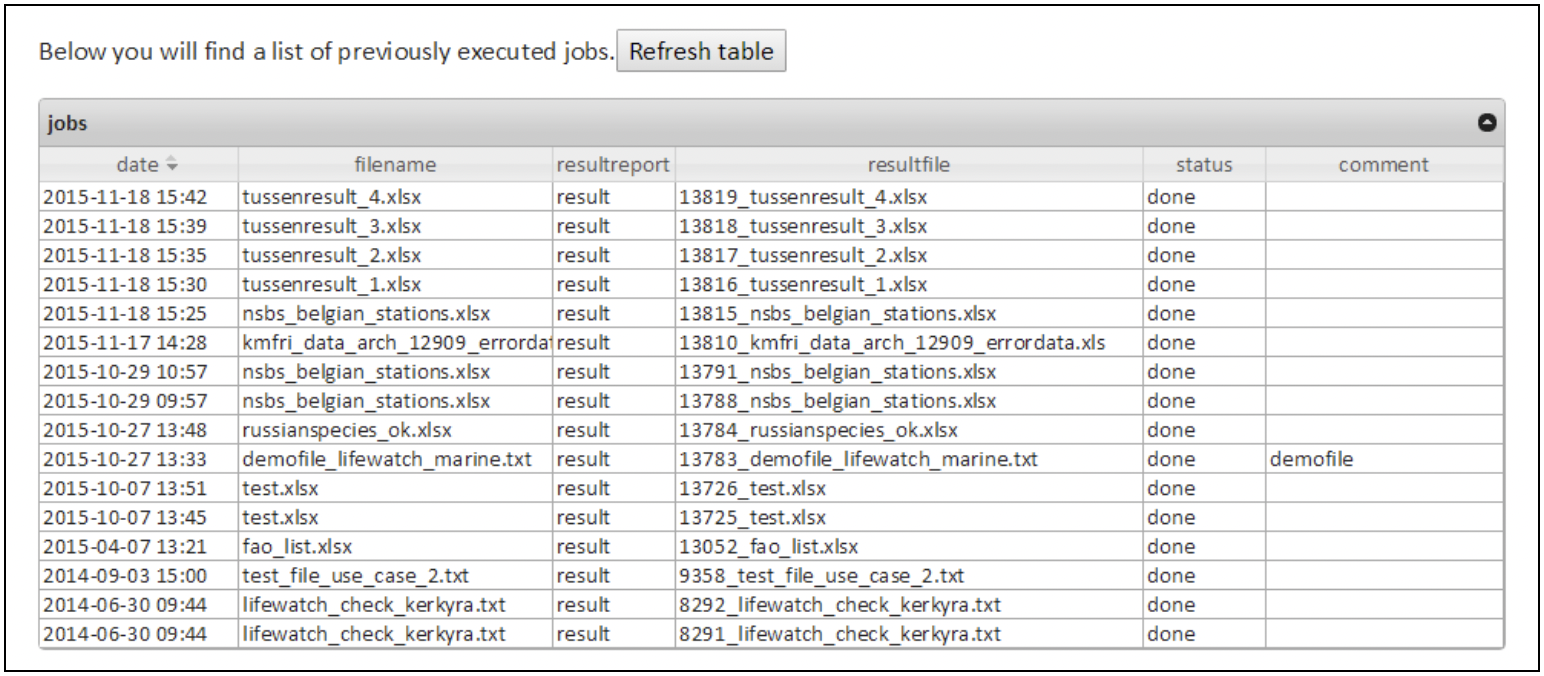
-
The LifeWatch.be portal uses a specific standard data format which is based on the OBIS Schema and the Darwin Core Version 2 standard.
This LifeWatch data format is a tab delimited (.txt) ASCII file and can contain the following fields: Survey, LocationID, Longitude, Latitude, WKTFootprint, EventID, SamplingProtocol, EventDate, MinimumDepth, MaximumDepth, FieldNumber, SampleSize, ScientificName, ScientificNameID, Sex, LifeStage, ObservedIndividualCount and AssociatedSequences.
Not all fields are required for every web service. The table below gives an overview of the required fields for the individual web services.
-
-
A number of use cases were also developed to demonstrate how to use the LifeWatch Belgium E-lab. Check out the use cases at the links below.
-
This user guide was developed by LifeWatch Belgium.